Integrating with Web3-Onboard
This tutorial is a step-by-step guide on how to integrate multiple wallets such as Coinbase Wallet, Metamask, and Wallet Connect into your dapp using the Web3-Onboard library.
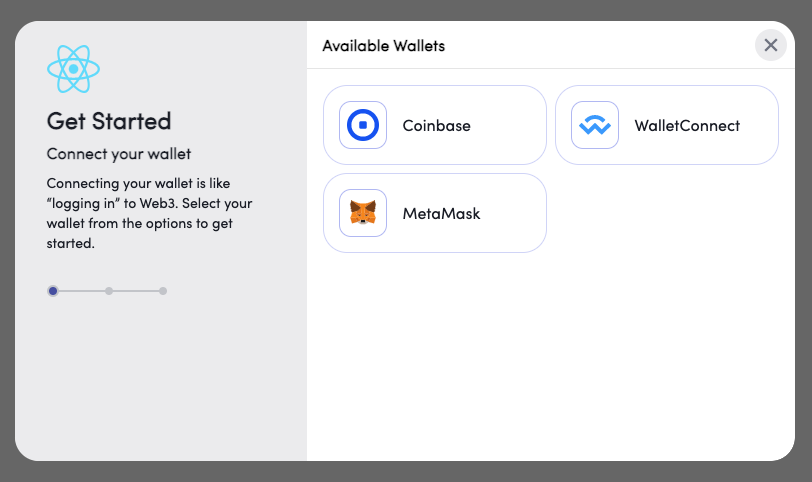
Note that Web3-Onboard comes with a built-in modal interface. This is a great out-of-the-box solution, but if you would like to customize the UI of your modal, check out our tutorial on web3-react
This guide assumes you have a React application already setup and running.
Prerequisites
- A working React application, set up using
npx create-react-app <app-name>or similar
Setup Onboard and Wallet Modules
Step 1: Install @web3-onboard/core
yarn add @web3-onboard/core
Step 2: Import and Instantiate Wallet Modules
Install the wallet modules of your choice. Here we install Coinbase Wallet SDK, Wallet Connect, and an Injected wallet (used to connect with Metamask).
yarn add @web3-onboard/coinbase # Coinbase Wallet
yarn add @web3-onboard/walletconnect # Wallet Connect
yarn add @web3-onboard/injected-wallets # Injected (e.g. Metamask)
In your App.js file, instantiate the modules to integrate into your dapp. Each connector has its own set of required parameters to pass in, such as a fallback JSON RPC URL or default chain ID.
Seeing errors? Check out the Troubleshooting section below for help.
import coinbaseWalletModule from "@web3-onboard/coinbase";
import walletConnectModule from "@web3-onboard/walletconnect";
import injectedModule from "@web3-onboard/injected-wallets";

const coinbaseWalletSdk = coinbaseWalletModule();
const walletConnect = walletConnectModule();
const injected = injectedModule();

const modules = [coinbaseWalletSdk, walletConnect, injected];
Step 2: Import and Setup Web3ReactProvider
Again, in App.js, instantiate Onboard with the created modules and a list of chains to be compatible with the library.
import Onboard from "@web3-onboard/core";

const MAINNET_RPC_URL = `https://mainnet.infura.io/v3/${process.env.INFURA_KEY}`;
const ROPSTEN_RPC_URL = `https://ropsten.infura.io/v3/${process.env.INFURA_KEY}`;
const RINKEBY_RPC_URL = `https://rinkeby.infura.io/v3/${process.env.INFURA_KEY}`;

const onboard = Onboard({
  wallets: modules, // created in previous step
  chains: [
    {
      id: "0x1", // chain ID must be in hexadecimel
      token: "ETH",
      namespace: "evm",
      label: "Ethereum Mainnet",
      rpcUrl: MAINNET_RPC_URL
    },
    {
      id: "0x3",
      token: "tROP",
      namespace: "evm",
      label: "Ethereum Ropsten Testnet",
      rpcUrl: ROPSTEN_RPC_URL
    },
    {
      id: "0x4",
      token: "rETH",
      namespace: "evm",
      label: "Ethereum Rinkeby Testnet",
      rpcUrl: RINKEBY_RPC_URL
    }
  ],
  appMetadata: {
    name: "My App",
    icon: "https://upload.wikimedia.org/wikipedia/commons/a/a7/React-icon.svg",
    logo: "https://upload.wikimedia.org/wikipedia/commons/a/a7/React-icon.svg",
    description: "My app using Onboard",
    recommendedInjectedWallets: [
      { name: "Coinbase", url: "https://wallet.coinbase.com/" },
      { name: "MetaMask", url: "https://metamask.io" }
    ]
  }
});
Connect and Disconnect from Wallet
Inside your App function, call the connectWallet method in the onboard instance to initiate the onboard popup modal.
function App() {
    const connectWallet = async () => {
    try {
      const wallets = await onboard.connectWallet();
    } catch (error) {
      console.error(error);
    }
  };

  return (
    <div className="App">
      <button onClick={connectWallet}>Connect Wallet</button>
    </div>
  );
}
Bind the methods onto your UI components. You should now be able to seamlessly connect to Coinbase Wallet and other wallets from your dapp.
To disconnect from the wallet, use the disconnectWallet method from the onboard instance along with the label of the user's primary wallet. You should refresh the state to clear any previously stored connection data.
function App() {
    const connectWallet = async () => {
    try {
      const wallets = await onboard.connectWallet();
    } catch (error) {
      console.error(error);
    }
  };

  const disconnect = async () => {
    const [primaryWallet] = await onboard.state.get().wallets;
    if (primaryWallet) await onboard.disconnectWallet({ label: primaryWallet.label });
    refreshState();
  };

  const refreshState = () => {
    setAccount("");
    setChainId("");
    setProvider();
  };

  return (
    <div className="App">
      <button onClick={connectWallet}>Connect Wallet</button>
            <button onClick={disconnect}>Disconnect</button>
    </div>
  );
}
Access connection, account, network information
You can use the onboard.state.get() method to fetch the state of your connection stored through the onboard instance. You can also fetch the state during the initial connection. The connectWallet method returns a list of wallet states that you can store in your state and use throughout the application.
First, add an import for React's useState:
import { useState } from 'react';
Then add code within your App function:
function App() {

  const [provider, setProvider] = useState();
  const [library, setLibrary] = useState();
  const [account, setAccount] = useState();
  const [network, setNetwork] = useState();

  const connectWallet = async () => {
    try {
      const wallets = await onboard.connectWallet();
      const { accounts, chains, provider } = wallets[0];
      setAccount(accounts[0].address);
      setChainId(chains[0].id);
      setProvider(provider);
    } catch (error) {
      console.error(error);
    }
  };

  ...

  return (
    <div className="App">
        <button onClick={connectWallet}>Connect Wallet</button>
            <button onClick={disconnect}>Disconnect</button>
            <div>Connection Status: ${!!account}</div>
            <div>Wallet Address: ${account}</div>
            <div>Network Chain ID: ${chainId}</div>
        </div>
  );
}
Switch Networks
You can use the setChain method provided by onboard to switch your network. Note that the target network must have been initialized with the onboard instance at the start of your application.
const switchNetwork = async () => {
await onboard.setChain({ chainId: toHex(network) });
};

<button onClick={switchNetwork}>Switch Network</button>
The full set of relevant Ethereum interactions can be found in the Web3-Onboard documentation.
Troubleshooting
I run into the following error: Module not found: Error: Can't resolve <'buffer'/'util'/...>
yarn add util
Then, add the following code snippet to your webpack.config.js:
resolve: {
  fallback: {
    'fs': false,
    'util': require.resolve('util/'),
  },
}
If you are using an application built on create-react-app locally, you must run npm run eject to be able to customize your webpack configuration.
The wallet connection does not persist upon refreshing the browser
// set cacheProvider parameter as true when instantiating web3modal
const web3Modal = new Web3Modal({
  cacheProvider: true, // optional
  providerOptions // required
});

// hook to automatically connect to the cached provider
useEffect(() => {
  if (web3Modal.cachedProvider) {
    connectWallet();
  }
}, []);>